Contact Us

Use the form on the right to contact us.

You can edit the text in this area, and change where the contact form on the right submits to, by entering edit mode using the modes on the bottom right. 


123 Street Avenue, City Town, 99999

(123) 555-6789

email@address.com


You can set your address, phone number, email and site description in the settings tab.
Link to read me page with more information.

Blog

Filtering by Category: Tutorials

Tutorial: Using an Acrylic Skin as Tracing Paper

Amy Shawley

I made a new video that talks about one of my favorite techniques with acrylic paint - using an acrylic paint "skin" as tracing paper!  I mention this a lot in my lectures and workshops, so it's fun to now have a quick video that you can reference for making these at home!   

Gilded Acrylics

Amy Shawley

 While putting together the tutorial for the post this week, I was reminded of a great travel experience I had when I was in California for my book tour in February.  I took a few days in between events to visit Julian, an old gold mining town in the San Diego mountains, and did a tour of the Eagle Mine.  I arrived right after a big group had gone through the mine and, as it turned out, was the only person on my tour.  It was so fun to have a one-on-one with both the guide and mine owner who were incredibly knowledgeable of the property itself, the mine, and the process of extracting gold.  I got the opportunity to learn how to pan for gold, which definitely takes a strong wrist and some finesse!  If you are ever in Julian, the Eagle Mine is a must-see!


The quest for gold traces back to antiquity and as a precious metal it has been highly prized for many uses, including artistic ones.  Guilding objects and paintings could happen quite easily because gold is highly malleable and can be flattened into sheets without breaking - it also resists tarnishing and discoloration, and today ancient objects still maintain their brilliant luster!  

Golden's Iridescent Golds also resist tarnishing, but this is mainly due to their being made not of actual metal but from tiny mica platelets that are coated with iron oxides and pigment to simulate the appearance of a metal.  There are three gold options: Iridescent Gold, Bright Gold, and Deep Gold...


 Today's simple tutorial uses Iridescent Bright Gold, because I love how it's rich yellow hue simulates the look of gilding!  The inspiration for this project comes from the water gilding technique which is used to make picture frames.  Gold leaf is applied to bole, a clay surface.  To simulate bole, I'm using Red Oxide.

The steps are similar to the ones from last week's copper tutorial, except here I didn't obliterate the stencil edges, I kept them clean.

Stencil a standard gel or paste onto your substrate and let it dry completely.  Paint a layer of Red Oxide (here I used Fluid Acrylic, but you can also use Heavybody) and let that dry.  Using a slightly dampened rag, buff Iridescent Bright Gold over the surface with light pressure and circular motion.  You want the gold to cover most of the surface and the stenciled texture, but leave some pockets of the red oxide exposed.  This gives the appearance of a gold frame that has a bit of wear and tear...


Notice how the Red Oxide shows through in places but the surface is primarily gold.  I'm choosing to leave this surface looking shiny and new with the look of untarnished gold leaf!  As with all of the textures this month, you can build them up and use them as your final image, or as a subtle decorative element.  


Using this technique, I made a background for a 4x4 inch painting of a hummingbird!


Copper

Amy Shawley


One of the things I love about Golden's Iridescent colors is that they offer two shades of Copper: Iridescent Copper and Iridescent Copper Light.  This is fantastic because when you look at raw copper (pictured below) it will change from a reddish to a more golden hue depending on the way the metal catches the light, so it's nice to have ready-made colors reflecting this effect!  Today's post focuses on these two hues of copper and a couple of my favorite ways to use them!


Below are some simple steps for how to use these coppers with texture and enhance them with a look of patina.

First you will want to start by texturing a substrate and since I used two coppers here, I textured two substrates (6x6 inch panels).  To create a texture, I used Heavy Gel (Semi Gloss) and moved it around with a palette knife.  On one surface I created a freeform texture with some areas that were a little more rough and some that were smoother.  On the other substrate, I used a stencil to introduce a peacock motif.  I obliterated parts the stencil and worked the gel all the way to the edges of the panel.  You will want to let the gel dry completely before adding color, I left mine to sit overnight...


Next I added color!  I like the look of Iridescent colors over dark underpaintings, so I started with a single layer of Raw Umber on both of my textures, working the color from all angles with the brush to be sure it rested in all of the texture valleys.  Let this layer dry before adding the copper.  To apply the coppers, I used a rag to buff the color over the brown, using light pressure to ensure that most of the coppers stayed on the texture peaks so some of the brown underpainting would show through.  I like to put a little bit of water in my rag to improve the flow of my color with this step.  I "buffed" Copper and Copper Light onto my respective substrates, though only the peacock texture and Copper are shown for this step below. 


If you like the look of shiny new copper, you can stop here!  If you like the look of weathered copper with a bit of patina, continue with the steps below...

I typically just use Fluid acrylics and do thin patches of "patina", but here I wanted to do something different, so I mixed up a thick recipe using Heavy Gel (Semi Gloss) combined with Teal and Titanium White (~50:50).


Use a rubber spatula to "squeegee" the patina recipe into the texture valleys.  If there is too much color here, buff some off with a damp rag.  If any of your copper areas get too saturated with the patina blue, use a cotton swab or brush to bring back some of the copper shimmer.  To add some more depth/weather to the surface, buff some Raw Umber into a few texture valleys and around some of the panel's edges...


Again, depending on your preferred style of work, your art can simply be the texture, or you can expand on it more by adding imagery and layers...


One of my favorite artists, Nick Kundson, paints representational work on actual copper using heat and acids to create natural patinas!  I love how he uses patinas to create negative space and build surreal compositions!  Check out his stunning work HERE!

Coming up next week: the Golds of Golden and layered textures!


Tarnished Silver Leaves

Amy Shawley

The blog theme for May is Metallic Textures!  All month long I'll be exploring fun ways you can use texture and iridescent colors in your work!  Look for mostly tutorials and videos, with a little bit of history and science here and there!  These projects are different from what is featured in my book, so those who have already tried some of my texture projects will get a whole new batch to play around with!

I love the look of tarnished silver and wanted to incorporate that into the project this week.  For this project you will need to make a textured "acrylic skin", which is a sheet of plastic that you can make on any surface acrylic paint won't adhere to (ie: glass, freezer paper, silicone).  You can build up one by hand with layers of acrylic gels or pastes or you can cast one in a silicone mold.  One of my favorite products to make molds from is Amazing Mold Putty.  Pictured below I am using one of my silicone-based Texture Maven molds in the leaf pattern (also pictured is the Crowsfoot pattern, but this project focuses on the leaves!).  

 Acrylic skins can be made out of many acrylic colors and mediums with the exception of highly gritty or brittle materials - here I am using Soft Gel (Gloss), it is white when wet but dries completely transparent.  Use a palette knife and with light pressure, fill the mold with gel.  Don't worry too much about your palette knife marks as they will not be seen in the final image, but be sure to make the gel thick enough so that it fills the texture valleys of the mold and sits above the lines in the mold by about 1/8" of an inch.  Gels shrink when they dry, so if the gel is flush with the lines in the mold, your acrylic skin will break apart in pieces instead of a sheet - this can be pretty cool too though, so try experimenting to see what you like!

At this thickness the gel may take a few days to dry and cure in your painting environment.  Mine took 48 hours.  When the skin is ready it will peel right out of the mold - notice below how it retains the form of the mold.  If you want to, cut out some pattern from the skin, I cut some voids from the skin so that it wasn't fully square...


Next you will want to paint the acrylic skin!  When I talk about this in demos, the biggest question I get is "Can I cast it in a color to skip this step?".  The answer is yes, but the reason I don't is that is more cost effective to cast thickly with gels and add a thin layer of color afterwards and you also won't change the properties of the color by diluting it or changing its sheen by tinting it with a gel.  

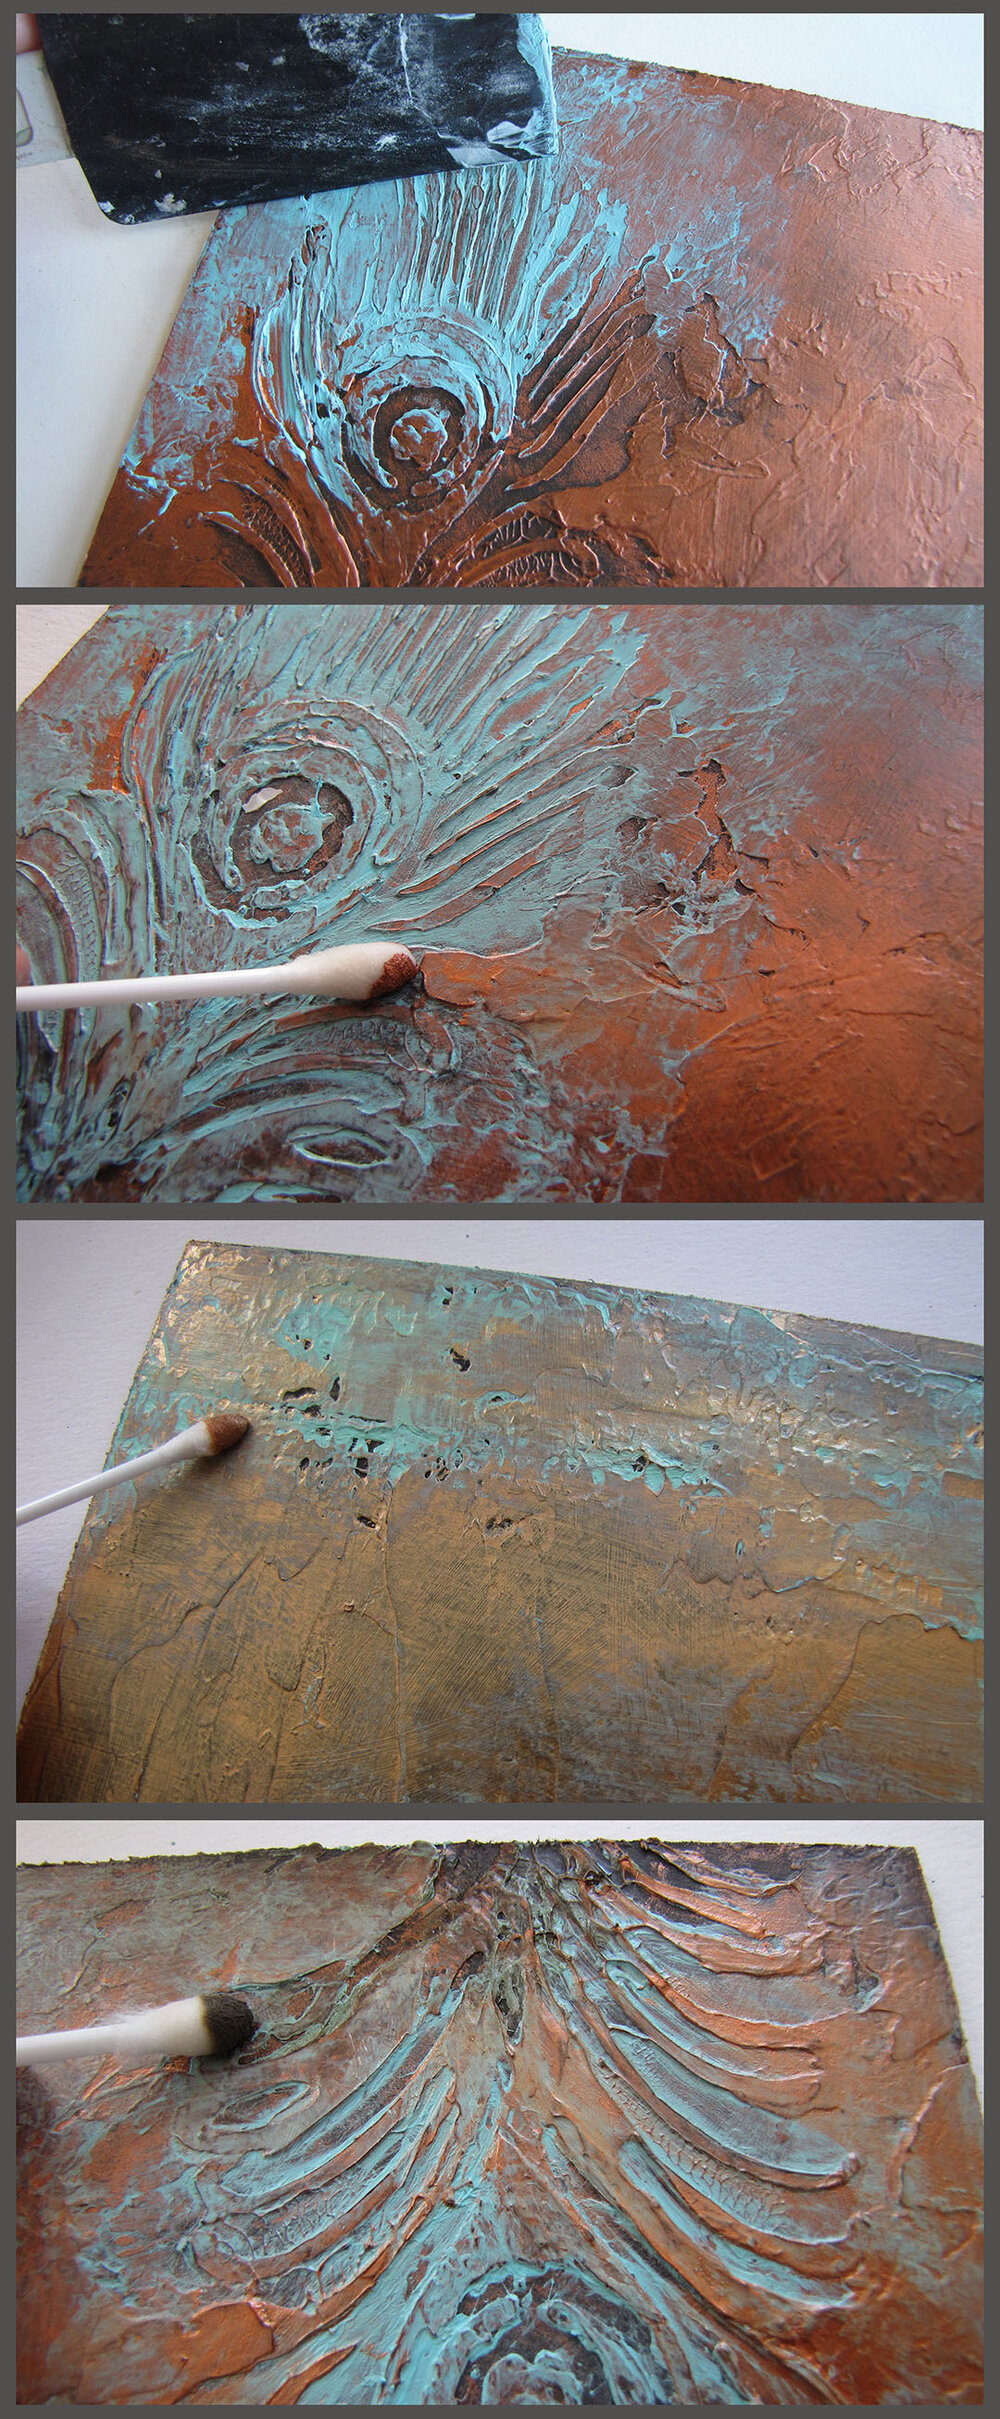
To paint my skin, I started with a coat of Raw Umber to establish a dark base, then brushed on Iridescent Silver and Iridescent Stainless Steel (Coarse).


When the silver layer is dry, give it a tarnished look by buffing some Raw Umber or Carbon Black into the texture valleys.  Use a brush (with a touch of water in it to improve the flow of color) and apply the paint to the textured skin, then use a rag to buff the excess color off of of the texture peaks.  If you make your surface too dark, you can use this same buffing application to apply more silver back to the surface!


Feel free to use whatever size substrate you want.  I had a 6x6 inch canvas from another project that I wanted to cover up, so I painted it with a coat of Raw Umber to mask what was below and have a nice dark base color that harmonized with the Raw Umber I used to "tarnish" my silver...


  The next step is to adhere the skin to the substrate.  You can use any standard acrylic gel to do this, here I am using Heavy Gel - mainly because it was sitting on the table next to me and was the first thing I reached for, but also because I like using thicker, high viscosity gels to adhere bulkier items so that I don't have to clamp them down.  Spread the gel across the substrate and be sure that the gel is sandwiched between the substrate and the back of the skin.  This acrylic skin is not heavily porous and will not soak through if you try to "glue" it down by putting gel on top of it the way you might do with some collage papers.  Gently press the skin into the gel and brush around the excess gel to give the substrate its own texture!


For my surface, I made a second acrylic skin to adhere on top of the first one.  I cast this acrylic skin from a mold I made of an actual leaf.  I used something called Amazing Mold Putty, rolled it out so it was about 1/8" and pretty flat, then pressed a leaf into the putty.  When the putty cured (takes about 20-30min to cure), I peeled the leaf out and its texture remained.  I repeated the same steps from above to make and paint this acrylic "leaf"...


To finish up my texture, I adhered the second leaf skin to the first using Heavy Gel, added a touch of Iridescent Silver to my Raw Umber background, unified my textures and sheen with a coat of Heavy Gel Semi Gloss (notice it is white when wet but dries translucent), then added some areas of Quinacridone Nickel Azo Gold to enhance the "tarnished" look.  


Depending on your preferred style of work, you can keep developing this texture or leave it be.  You may like to have it as an embellishment on a much larger surface instead of covering the whole width of the image.  Acrylic skins can be used to add textures to flat substrates like canvas and panels, but can also be adhered to sculptural substrates like ceramic.  If you find yourself using this technique in a project, dont hesitate to email me with your questions!  For more textured acrylic skin ideas, check out my books!


Tarnished Silver Leaves, Acrylic Skins on Canvas, 6x6 inches